By Taylor Dixon • Difficulty: Moderate
The Nintendo Switch comes with two Joy-Con controllers. This guide shows how to replace the joystick of the left Joy-Con. The procedure for repairing the right Joy-Con is different, so be sure to follow the correct set of instructions for your controller.

- Remove the four Tri-Point Y00 screws from the back panel of the Joy-Con.


- Insert an opening pick into the seam at the bottom edge of the controller (opposite the L and ZL buttons).
- Slowly slide the flat edge of your opening pick up the side of the Joy-Con.


- With the charging rail facing away from you, open the the Joy-Con like a book.


- Use a spudger to gently pry the battery connector straight up from its socket on the motherboard. This will keep the Joy-Con from powering on during the repair.


- Insert an opening pick between the battery and the Joy-Con housing.
- Gently pry out the battery, which is lightly taped in place.

- Remove the three 3.5 mm golden Phillips #00 screws from the midframe.

- Carefully flip the midframe over, away from the motherboard, as if you were turning the page of a book.


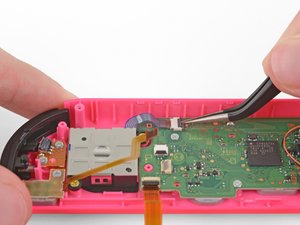
- The ZL button cable is locked in place by a small ZIF connector on the motherboard. Use tweezers or a spudger to flip up the ZIF connector lock opposite the cable.
- Use tweezers to gently pull the ZL button flex cable out of the ZIF connector socket. The midframe is now disconnected and can be removed.


- Unlock the minus button’s ZIF connector and disconnect the cable.


- Finally, the joystick is locked into place by one last ZIF connector. Carefully flip the ZIF lock upward and disconnect the cable.

- Remove the two 3.5 mm Phillips #00 screws from the joystick.


- Carefully remove the joystick from its housing.


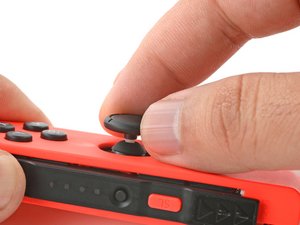
- Use your fingers to pull the thumbstick off of the Gulikit joystick module.


- Peel the ring sticker from its liner.
- If the sticker center is still attached, separate and remove it from the ring.
- Set the ring sticker in the joystick recess and press it with your fingers for a few seconds to attach it.
To reassemble your device, follow the above steps in reverse order.
Take your e-waste to an R2 or e-Stewards certified recycler.
Repair didn’t go as planned? Check out our Answers community for troubleshooting help.