By William Hurty • Difficulty: Moderate
If your battery is dead, damaged, or simply dies too quickly then use this guide to replace it. Be cautious as to not damage the ribbon cable or to puncture the battery.
WARNING: Following this guide will damage the waterproof seal on your watch.
NOTE: Since 2018, there has been a well-known issue with high battery drain on some Gear S3 devices (https://us.community.samsung.com/t5/Gear...) and following this guide to replace your battery may not solve the issue. It is recommended that S3 owners attempt software fixes (leaving device off for days, performing updates, uninstalling apps, fully charging while on/off, etc) before attempting a battery replacement.
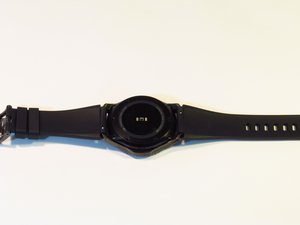
- Place the watch screen-down so that its back cover is showing.
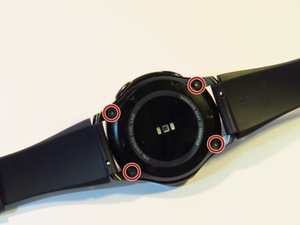

- Remove the four 4.2mm screws with a Y00 screwdriver.


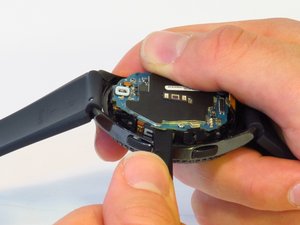
- Wedge the metal spudger in between the back cover and the frame along the seam.
- Use force to pry the back cover away from the main watch frame.
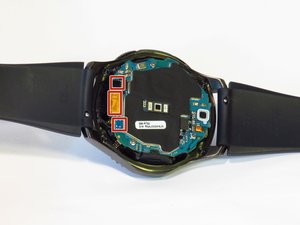


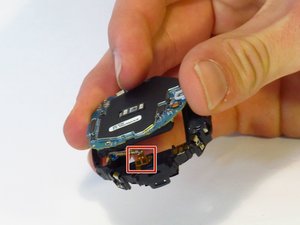
- Detach the three connectors on the motherboard using your fingernail.


- Separate the motherboard and front screen assembly using a spudger.


- Using a JIS #00 screwdriver, remove the two 4.5 mm screws.


- Disconnect the battery ribbon cable from bracket.
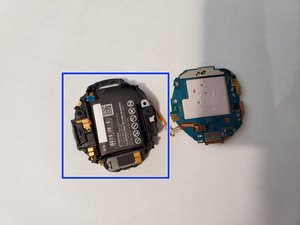
- Separate the chassis from the motherboard.


- Separate the battery from the motherboard.

- When reassembling, place the battery into the plastic assembly first. Don’t stick it to the adhesive first. This way, it’s easy to position the battery cable.
- When securing the battery cable, make sure the hole that the peg goes through is round. The hole on your replacement battery’s cable could be malformed. You may want to widen the hole before securing the cable.
- To widen the hole, use the Pro Tech Toolkit’s SIM tool, a small paperclip or similar fine-tipped tool. The tool can also be used to gently press the battery cable into the correct position. Do this carefully to avoid damage.
- Follow steps 8-1 in reverse order to reassmble.
To reassemble your device, follow these instructions in reverse order.