By Jack Ng • Difficulty: Moderate
Your battery may need to be replaced if it doesn't hold a charge or is not charging at all. The JBL Charge 3 has a 6000mAH battery.
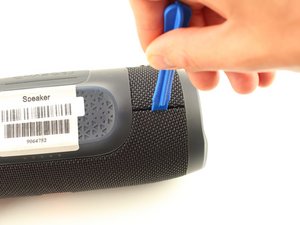


- Turn your speaker upside down and insert the plastic opening tool vertically into the slit in the front cover.
- Slowly pull the plastic opening tool outward to remove the four clips holding the covering in place.
- Repeat this process for all four edges of the front cover.
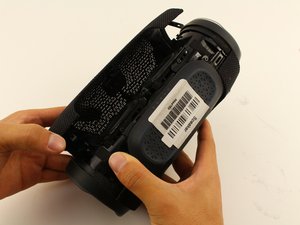
- Pull apart your cover gently from both sides and remove it from the speaker housing.
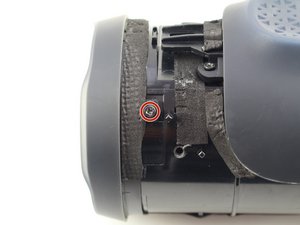


- Remove the two 8mm Phillips #1 screws from the tabs.
- NOTE: There may be only one screw.


- Insert the plastic opening tools underneath both tabs.

- Twist and pull open the passive radiator. The left radiator twists off clockwise; the right counterclockwise.


- Repeat all previous steps for the other passive radiator.
- NOTE: only the right radiator needs to be removed for changing the battery.


- Remove the six 8mm Phillips #1 screws from the outer battery cover.
- Peel the outer battery cover away from the speaker housing.


- Remove the seven 8mm Phillips #1 screws from interior battery cover.
- Remove the interior battery cover.


- Pull gently to disconnect the bundled cable connector in the side of the speaker. This action will separate the battery from the motherboard.
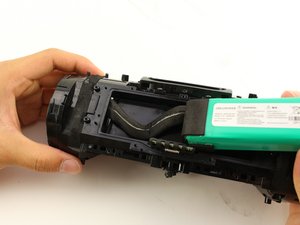
- Pull the battery and battery cable out from their housing.
To reassemble your device, follow these instructions in reverse order.