By edwardb • Difficulty: Moderate
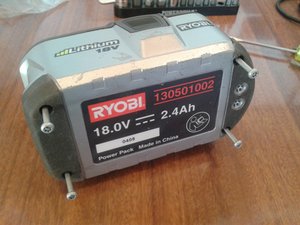
This guide applies to Ryobi One+18V Li-ion Battery (130501002), but should also have more general application. This guide will show you how to disassemble the battery pack and check the cell balance and rebalance the cells if necessary.
The battery should normally measure about 18V across the terminals (21V max). If it reads about 12V, then it is likely the battery protection circuit has activated because of cell imbalance. (Those were my symptoms.)
Cell re-balance could also help if the battery isn't taking a full charge (not showing green on the fuel guage button).
The time estimate for this guide is for disassembly and cell balance measurement. Cell rebalance charge time is extra.
CAUTION: Battery disassembly exposes high current circuits. Be careful!
This battery is of 2P5S configuration (sets of 2 parallel cells, 5 sets in a series string). It uses Sanyo 18650 Li-ion cells.

- CAUTION: Battery disassembly exposes high current circuits. Be careful!
- Remove the four T15 security screws from the bottom.
- Remove the one T10 screw on the top.


- Lever the cover clips to remove the top cover. Leaver up so the base pops out.
- Using an insulated instrument, lever the battery terminal assembly down inside the top cover.
- CAUTION: use of a metal instrument for the above step risks shorting the battery contacts.
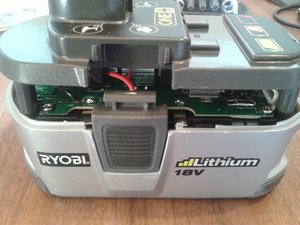

- Once there is enough gap, reach in and hold the battery terminal assembly, while sliding off the top cover.
- The battery catch clips on the sides can be removed if you want.

- With a Digital Multimeter (Volt Meter) set to DC Volts, measure the cell balance. The nickle straps are good test points. Note the cell voltages.
- Cell 1: TP6 to CL1
- Cell 2: CL1 to CL2
- Cell 3: CL2 to CL3
- Cell 4: CL3 to CL4
- Cell 5: CL4 to CL5 (Battery Pos)
- The cell voltages should be in the range 3.0V to 4.2V. The cells should all read about the same, say 3.9V. If the cells are more than 0.1V different, then cell imbalance could be a problem for your battery pack.

- Use a Benchtop Power supply with adjustable voltage and adjustable current limit. Voltage and current meters are necessary too. Example, the Topward 3000 series. Set the voltage to the higher cell voltage you measured, but no more than 4.2V. Set the current limit to 0.5A.
- Connect the power supply to the cell to be charged up (rebalanced), positive to positive, negative to negative. Crocodile clips are useful for this.
- As the cell charges up the voltage will rise and stop at the set voltage, then the current will start to decrease toward zero. When the current drops to near zero the cell is charged.
- Remove the power supply and repeat the cell voltage measurements.
- Repeat charging on other cells until all cells are within about 0.1V.
To reassemble your device, follow these instructions in reverse order from step 3.