By Michael Wozny • Difficulty: Moderate
A battery, after a certain period of time, will begin to lose its life span after a charging period. This guide highlights how to remove the back cover of the tablet in order to get to the battery as a means to replace it.

- At the top portion of the memory card slot, use the small metal spudger to create separation between the back cover and the rest of the device.


- Use the intermediate metal spudger in place of the small metal spudger to remove the back cover. This is done by sliding the intermediate metal spudger around the perimeter of the device, beginning at the top portion of the memory card slot.
- The second picture shows the internal portion of the device once the back cover is removed.

- Disconnect the electrical connector from the motherboard using the bent precision tweezers.
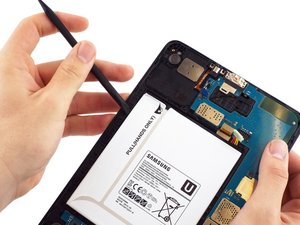


- Use the flat end of the plastic spudger to pry the battery apart from the rest of the device.
- Once the back cover and battery are removed, the device should look like as illustrated in the second picture.
To reassemble your device, follow these instructions in reverse order.